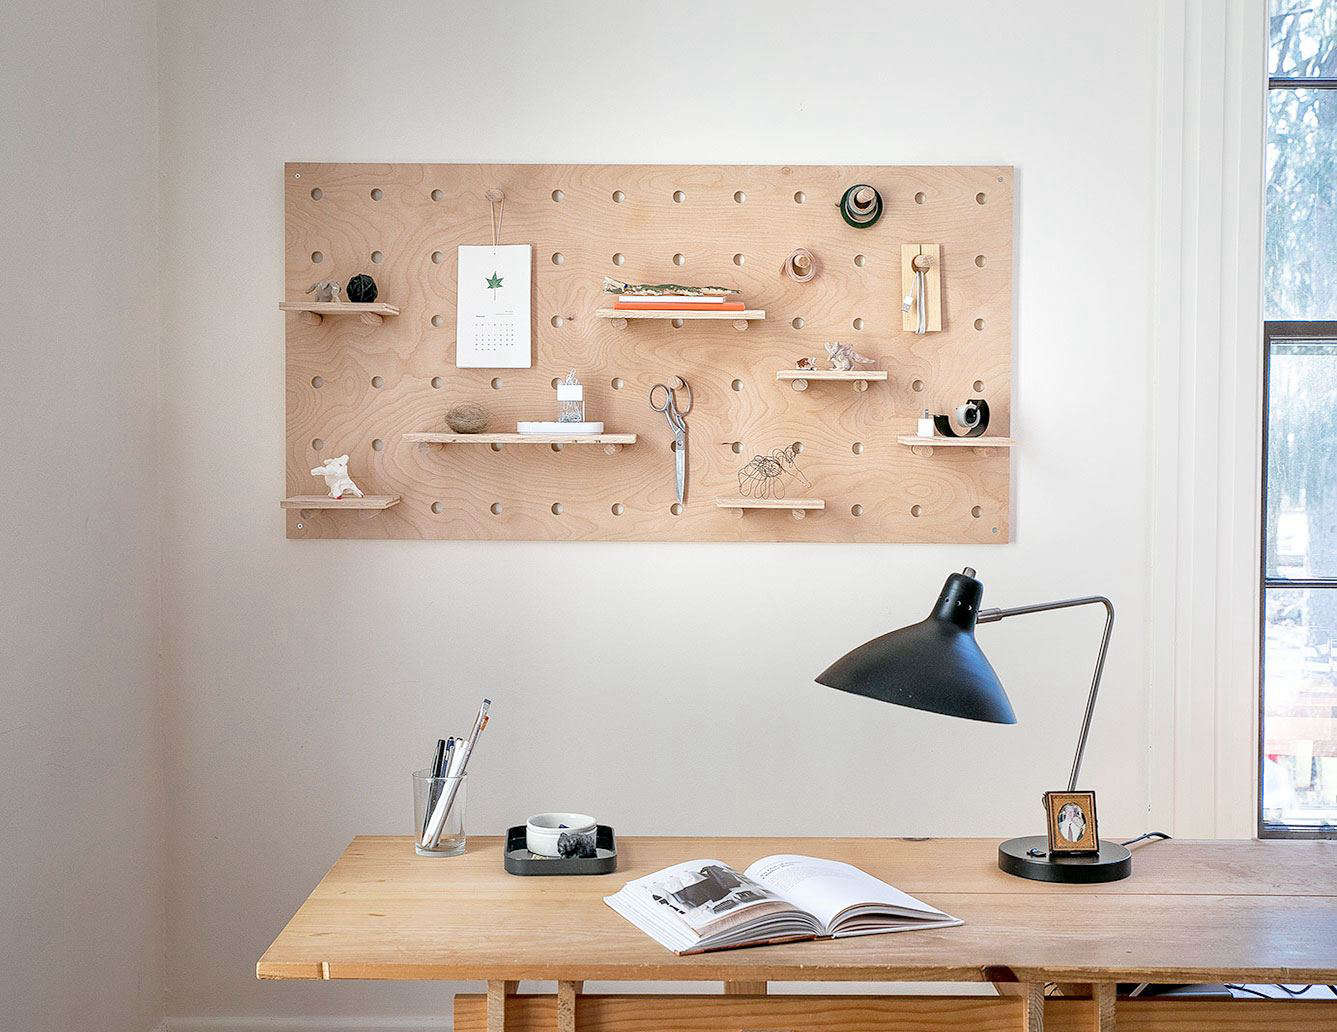
There is a specific kind of quiet satisfaction that comes from a perfectly organized wall. It’s the "less, but better" philosophy made manifest—a design ethos championed by German industrial legends like Dieter Rams. In the world of high-end interior design, the oversized plywood pegboard has transcended its workshop origins to become a modular masterpiece. Whether you are looking to display a curated collection of ceramics or organize a home office that feels more like a gallery, a custom German-inspired storage wall offers the ultimate blend of utility and minimalist warmth.
The beauty of this project lies in its accessibility. While a premium modular system from a high-end designer can easily cost thousands, you can achieve the same architectural look in your own garage. A DIY custom birch pegboard can be constructed for approximately 10-15% of the cost of premium modular systems like the Vitsoe 606 or Joybird Owen Media Console. Better yet, it isn't a week-long endeavor. How long does it take to build a DIY German-inspired pegboard? It typically takes 4 to 5 hours to complete a 24x48 inch birch plywood pegboard, making it a perfectly feasible one-day project for any hobbyist with a steady hand and a drill.
Why DIY? The Cost-Benefit of Custom Modular Shelving
When you step into the world of modular furniture, you often face a choice: the flimsy, mass-produced pegboards found at big-box hardware stores, or the eye-wateringly expensive designer units. By choosing to build your own, you aren't just saving money; you are gaining total control over the scale and density of your storage.
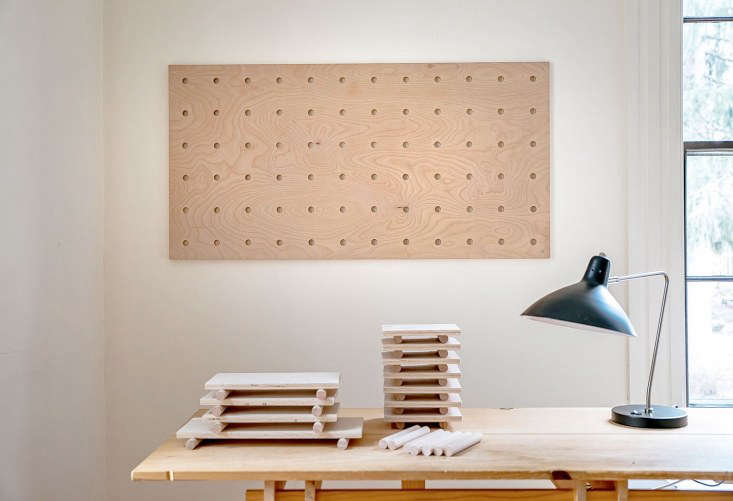
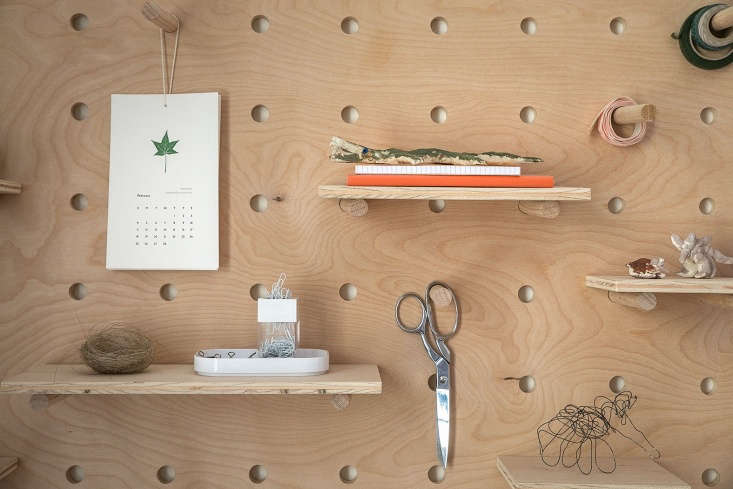
A standard 24-by-48-inch template layout features a 2-inch border and 4-inch center-to-center hole spacing, providing 72 potential modular attachment points for maximum storage density. This grid allows you to move shelves, hooks, and pegs as your needs evolve. If you decide to upgrade from a small succulent collection to a full library of art books, your wall can adapt in seconds.
Materials & Tools: Selecting the Right Foundation
The secret to that "high-end" look isn't just in the craftsmanship; it’s in the timber. If you walk into a project using construction-grade plywood, the result will look like a workshop organizer. To achieve a designer finish, you must be selective.
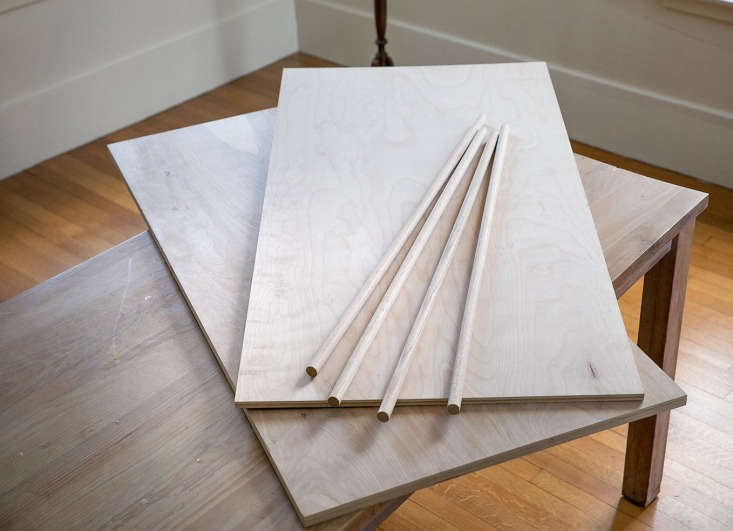
What is the best wood for a high-end storage wall? ¾-inch thick Baltic birch plywood is recommended for the base. Unlike standard plywood, Baltic birch features a high number of thin layers (plies) which gives it superior strength and a distinct, beautiful cross-banded grain on the edges. The surface is exceptionally smooth and light, providing that clean, Scandi-German aesthetic that defines modern minimalism.
| Material/Tool | Specification | Purpose |
|---|---|---|
| Base Board | 3/4" Baltic Birch Plywood | The structural foundation and aesthetic surface. |
| Pegs | 3/4" Hardwood Dowels (Oak or Maple) | To support shelves and hang items. |
| Shelving | 3/4" Baltic Birch Offcuts | For custom-sized modular shelving. |
| Drill Bit | 11/16" Forstner Bit | To create clean, flat-bottomed holes with a friction fit. |
| Mounting | 3-inch Wood Screws & Stud Finder | To secure the board safely to wall studs. |
Step-by-Step Build Guide: Crafting the System
Step 1: Prepping the Base Board and Edges
Start by having your plywood cut to your desired dimensions. While 24x48 inches is a standard manageable size, you can go larger if you have a helper. Use a table saw or a circular saw with a fine-finish blade to ensure the edges are crisp. Once cut, sand the edges starting with 120-grit and moving up to 220-grit. Because you are using Baltic birch, those exposed "striped" edges are a design feature—don't hide them with edge banding.
Step 2: Creating the Grid Template
Precision is what separates a DIY project from a professional installation. Using a large T-square, mark a 2-inch border around the entire perimeter. Within that border, mark a grid with 4-inch center-to-center spacing.
Pro-Tip: Don't just draw lines. Use an awl or a small finishing nail to "punch" a tiny pilot hole at every intersection. This prevents your drill bit from "walking" or slipping when you start the actual drilling process, ensuring your grid remains perfectly vertical and horizontal.
Step 3: Precision Drilling Strategy
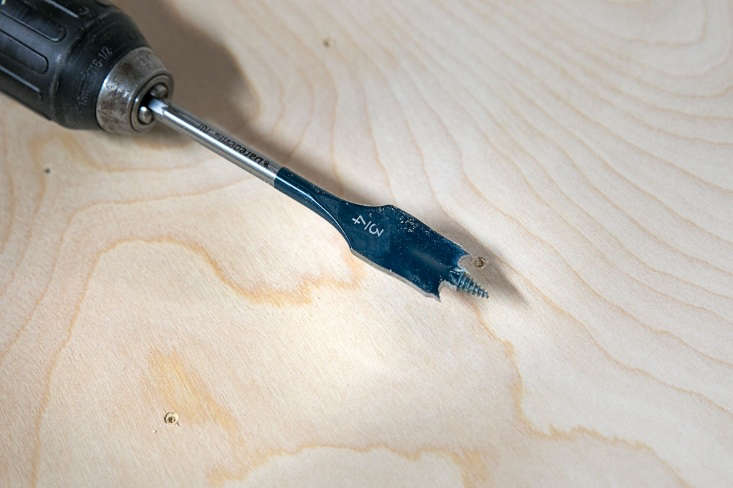
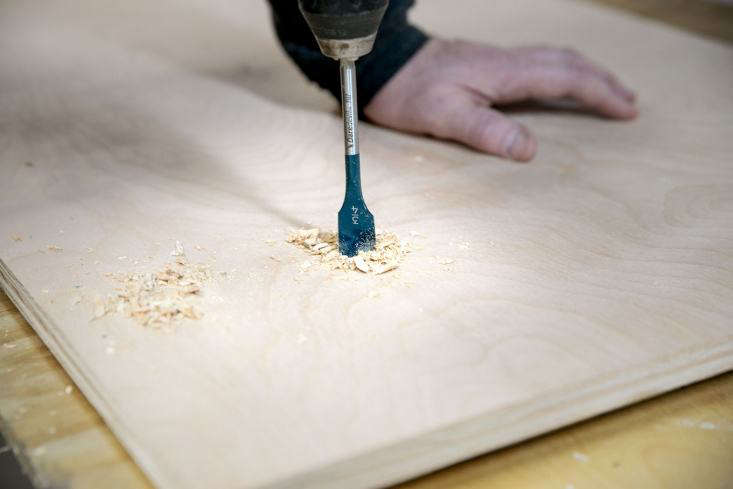
This is the most critical phase. You want your pegs to stay in place without glue or fasteners. How do you ensure pegs fit securely in a DIY pegboard? Using an 11/16-inch drill bit for 3/4-inch dowels provides a tighter friction fit than a standard 3/4-inch bit.
Because a 3/4-inch dowel is rarely exactly 0.75 inches (they often shrink slightly), a standard 3/4-inch bit often results in a loose, wobbling peg. Using an 11/16-inch Forstner bit—which cuts much cleaner than a spade bit—creates a snug "press-fit" that feels professional and secure.
Step 4: Sanding and Finishing for a High-End Look
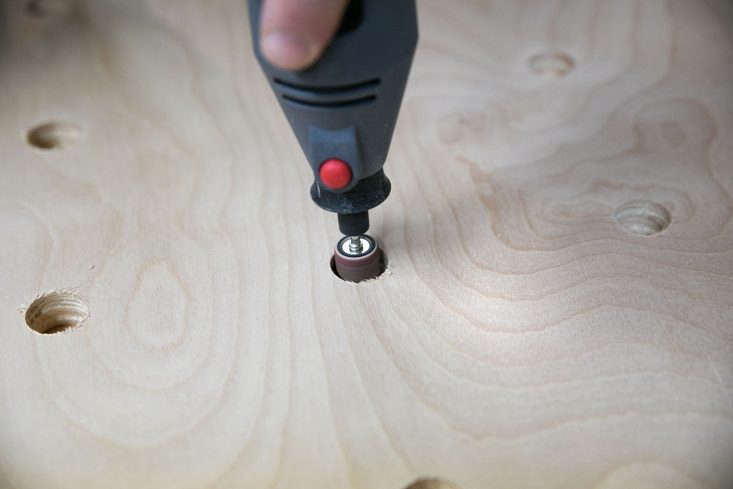
After drilling 72 holes, you will likely have some "tear-out" or splinters on the back and front of the board. Take your time with an orbital sander to smooth the entire surface. For the holes themselves, wrap a piece of 220-grit sandpaper around a pencil or a smaller dowel to lightly sand the interior of each opening.
To maintain the light, airy look of German design, avoid dark stains. A clear water-based polyurethane or a high-quality furniture wax will protect the wood without yellowing it over time.
Step 5: Constructing Custom Shelves and Pegs
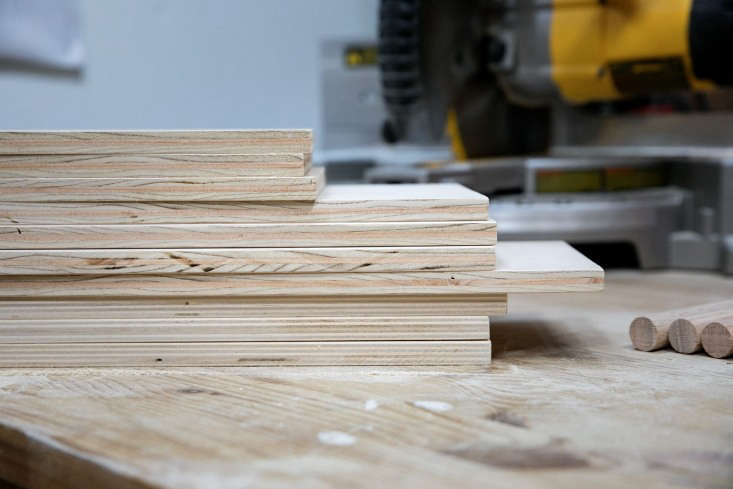
Cut your hardwood dowels into 6-inch lengths for standard shelves. To make the shelves, cut pieces of your leftover birch plywood to various widths (e.g., 6-inch, 12-inch, and 18-inch). You don't need to screw the shelves to the pegs; the weight of the objects on the shelf will hold them in place if your pegs are level.
Installation & Layout Planning
A 24x48-inch sheet of 3/4-inch plywood is heavy. Once you add shelves and books, the weight is significant. Safety is paramount here.
- Locate the Studs: Never rely on drywall anchors for a project of this scale. Use a high-quality stud finder to locate the vertical framing members in your wall.
- Use a Ledger Board (Optional): If you are working alone, screw a temporary "ledger" strip of scrap wood to the wall at the height where you want the bottom of the pegboard to sit. This allows the board to rest on the strip while you level it and drive in your primary screws.
- Spacing for Pegs: You cannot mount the plywood flush against the wall, or the pegs won't have anywhere to go. You must create a "gap." Screw 1x2-inch wood furring strips to the back of your pegboard (aligned with your wall studs) before mounting. This creates a 3/4-inch space between the board and the wall, allowing the pegs to sit deep and secure.
The 'Buy vs. Build' Alternative: Top Modular Picks
While the DIY route is immensely rewarding, it isn't the right fit for everyone. If you lack the tools or the time, there are several premium ready-made options that capture the same German minimalist spirit.
- Vitsoe 606 Universal Shelving System: The gold standard. Designed by Dieter Rams in 1960, it uses aluminum E-tracks and is an investment piece meant to last a lifetime.
- String Furniture: A classic Swedish alternative that offers a lighter, wire-frame look while maintaining that modular, grid-based logic.
- Povison & Joybird: These brands offer mid-century inspired plywood and walnut units that are "ready-to-assemble," providing a middle ground between a raw DIY project and a custom architectural installation.
Choosing a fully assembled unit is ideal if you are renting and need a system that can be disassembled and moved without leaving large holes in the studs, or if you simply prefer the refined powder-coated finish of metal systems.
Conclusion: Personalizing Your Modular Sanctuary
The true magic of a German-inspired storage wall isn't the wood or the grid—it’s how it changes the way you live in your space. By moving your "stuff" from cluttered horizontal surfaces to an organized vertical grid, you create visual breathing room.
As you style your board, remember the "German Minimalist" rules: leave some holes empty to let the wall breathe, group items by function, and don't be afraid to mix organic elements—like a trailing ivy plant—with the rigid geometry of the plywood. This system is designed to evolve. As your hobbies change, your wall changes with you, serving as a living gallery of your life at home.
FAQ
Q: Can I use 1/2-inch plywood instead of 3/4-inch to save money?
A: I wouldn't recommend it. 1/2-inch plywood is prone to bowing under the weight of shelves, and the "friction fit" for the pegs is much less secure because there is less surface area for the peg to grip. For a high-end look and safety, 3/4-inch is the standard.
Q: Do I need a drill press for the holes?
A: A drill press is ideal for ensuring 100% perpendicular holes, but it isn't strictly necessary. If you are using a hand drill, I highly recommend using a "drill guide" attachment. This is a small, inexpensive jig that holds your hand drill perfectly straight, ensuring your pegs don't lean downward.
Q: How much weight can a DIY pegboard shelf hold?
A: When properly mounted into wall studs and using 3/4-inch hardwood pegs with a friction fit, a single 12-inch shelf can easily hold 15-20 lbs. However, always distribute the weight evenly and avoid putting heavy, fragile items on the very edge of long shelves.