We have all been there: standing in front of an open freezer, shivering as we dig through frost-covered bags of "mystery meat" and half-empty boxes of freezer-burned waffles. It is a place I like to call the "Frozen Abyss"—the land that time (and dinner plans) forgot. Most people treat their freezer like a toy chest, tossing items in wherever they fit, only to realize months later that they’ve been rebuying peas they already had buried at the bottom. But here is the good news: by applying a few intentional systems, you can reclaim up to 45% of your usable storage space and reduce your household food waste by approximately 20%. Turning your freezer from a chaotic pile into a functional "grocery store" in your own kitchen isn't just about aesthetics; it’s about saving money and making weeknight cooking a breeze.
Rule 1: The Ruthless Purge
Before you buy a single bin or print a single label, you must face the reality of what is currently living in your freezer. Most of us are holding onto "aspirational" ingredients—that bag of frozen kale for smoothies you never made, or the leftover turkey from three Thanksgivings ago. To organize effectively, you have to be ruthless.
Start by taking everything out. Yes, everything. As the items hit your counter, perform a three-second audit. If you can’t identify what it is through the frost, if it has significant ice crystals inside the packaging (a sign of freezer burn), or if it’s been there for more than six months without a clear purpose, it belongs in the bin. This isn't just about making room; it’s about food safety and quality.
Sophie’s Pro-Tip: To make the transition easier, I recommend hosting a "Freezer Meal Week" right before your big organization project. Challenge yourself to cook only from the freezer for five days. You’ll be surprised at how many "mystery containers" you can clear out simply by turning them into a creative soup or stir-fry.
Once the freezer is empty, take this rare opportunity to wipe down the interior surfaces with a mixture of warm water and vinegar. While the unit is empty, grab your measuring tape. You need the exact internal dimensions—width, depth, and height—before you can move on to the next rule.
Rule 2: Contain the Chaos with Strategic Baskets
If you own a chest freezer, you know the struggle of the "bottomless pit." To organize a chest freezer effectively, use stackable wire baskets to create layers and maintain a whiteboard inventory map to track items in the bottom, middle, and top sections. This prevents the "piling" effect that leads to forgotten food.
The choice of container material matters more than you might think. While clear plastic bins are wonderful for upright freezers because they allow for maximum visibility, wire baskets are often superior for chest freezers because they allow for better airflow, ensuring that your food stays at a consistent, safe temperature.
| Container Type | Best For... | Pro | Con |
|---|---|---|---|
| Wire Baskets | Chest Freezers | Excellent airflow; stackable | Small items can fall through |
| Clear BPA-Free Bins | Upright Freezers | High visibility; easy to pull out | Can crack if dropped when frozen |
| Reusable Grocery Bags | Bulk Meat Storage | Low cost; easy to lift | Zero visibility; prone to slouching |
If you are on a budget, don't feel pressured to buy high-end organizational systems. I have seen clients successfully use milk crates or heavy-duty reusable grocery bags to act as "zones." For example, all your poultry goes in the green bag, beef in the red bag, and frozen veggies in the blue bag. This simple color-coding ensures that even when you're in a rush, you aren't burying the steak under five bags of frozen corn.
Rule 3: Master the 'Freeze Flat' & Vertical File Method
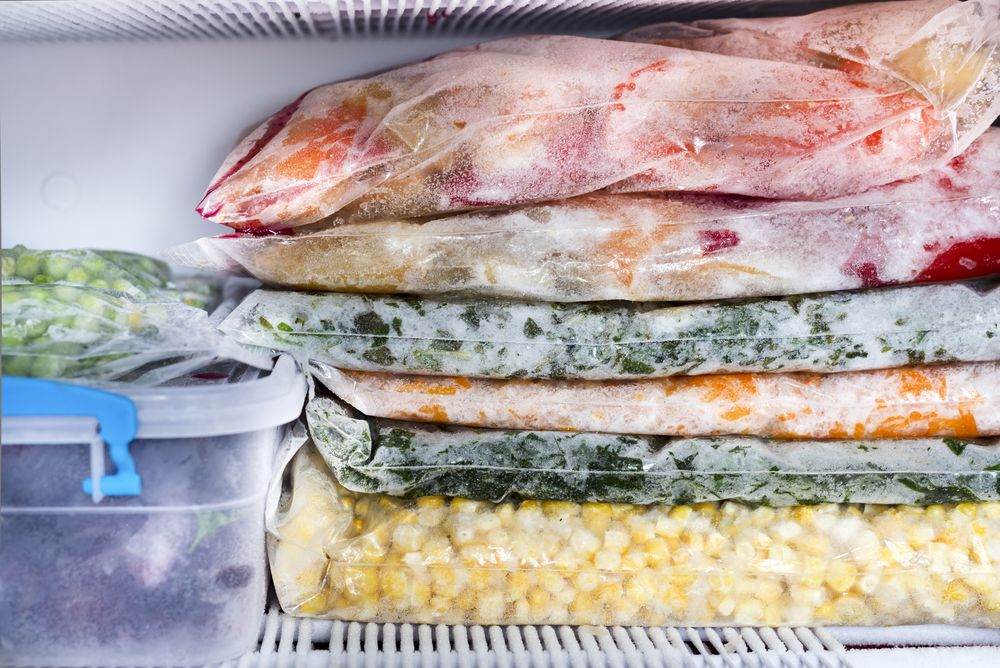
This is the rule that yields the most dramatic results. The 'freeze flat' method involves pouring liquids (soups, stews, sauces) into freezer bags, removing all air, and laying them horizontal to freeze into thin 'bricks' that can be stacked like records. This single change can increase your usable freezer storage capacity by up to 45% compared to disorganized piling.
When you freeze a bag of chili standing up or shoved into a corner, it freezes into an awkward, lumpy shape that refuses to play nice with other items. However, if you lay that same bag flat on a cookie sheet until it’s solid, it becomes a uniform "brick." Once frozen, you can stand these bricks up vertically in a bin, much like folders in a filing cabinet.
How to Execute the Vertical File System:
- Flash Freeze First: For individual items like berries, meatballs, or cookie dough, spread them out on a tray for an hour before bagging. This prevents them from clumping into one giant frozen mass.
- The Burping Technique: When bagging liquids, seal the bag almost all the way, then gently press the air out until the liquid reaches the seal. Only then, close it completely. No air means no freezer burn.
- The Library View: Arrange your "bricks" with the labels facing up. This allows you to flip through your meals like you're browsing at a record store, seeing exactly what you have without moving a single item.
Rule 4: Label Everything (Because You Will Forget)
We all suffer from the "Sunday Afternoon Delusion"—that moment when we think, “Of course I’ll remember this is beef stroganoff and not mushroom gravy.” Fast forward three weeks, and that frozen block is unrecognizable. Labeling is the bridge between a system that works and a system that fails.
Labeling and dating frozen items reduces household food waste by approximately 20% by preventing 'mystery containers' from reaching the point of freezer burn. If you know a container of soup was made in January, you're much more likely to eat it in March than if it’s an undated mystery.
- Essential Tools: Keep a dedicated kit near the freezer containing a permanent Sharpie, freezer tape (which handles moisture better than masking tape), or oil-based paint markers.
- The "Eat First" Zone: Create a specific bin or area labeled "EAT ME SOON." This is where you put items that are nearing their six-month mark or leftovers that need to be consumed within the week.
- Category Labels: Label the bins, not just the food. Use broad categories like "Prepared Meats," "Smoothie Preps," "Baking Supplies," and "Quick Dinners."
Rule 5: Portion Control and Protection
One of the biggest mistakes in freezer management is freezing food in quantities that are too large for a single meal. Once you defrost a gallon of chicken stock, you have to use it or lose it. To prevent freezer burn and make your life easier, ensure food is wrapped airtight using vacuum sealers or cling wrap, and maintain a consistent temperature of 0 degrees Fahrenheit.
The "Puck" Method: For ingredients like pesto, tomato paste, or concentrated broth, use large silicone muffin molds or "Super Cubes." Once frozen into "pucks," pop them out and store them in a labeled freezer bag. This allows you to grab exactly one or two servings without thawing a massive container.
The Double-Wrap Defense: Freezer burn happens when air reaches the surface of the food and dehydrates it. For long-term storage (like meat purchased in bulk), don't rely on the original grocery store packaging. Wrap the item tightly in plastic wrap (getting rid of all air pockets), then wrap it again in heavy-duty aluminum foil, or better yet, use a vacuum sealer. This double layer of protection is the difference between a juicy steak and a gray, leathery disappointment.
Rule 6: Implement a Visual Inventory Map
The final step in mastering your freezer is the "out of sight, out of mind" fix. If you have a chest freezer, you physically cannot see what is at the bottom. To solve this, utilize a magnetic whiteboard on the front of the freezer (or the lid of the chest freezer).
This whiteboard acts as your "Control Center." Divide it into sections that mirror your freezer bins. When you put a bag of frozen shrimp in the "Seafood" bin, add a tally mark to the whiteboard. When you take it out to make scampi, erase the mark.
Why this works:
- Meal Planning: You can plan your entire week of meals from the comfort of your kitchen table without ever opening the freezer.
- Layer Mapping: For chest freezers, the map tells you exactly which layer to dig to. "Bottom Layer: Whole Turkeys & Bulk Beef; Middle Layer: Frozen Veggies; Top Layer: Ice Cream & Breads."
- Maintenance: Pairing a freezer check-in with your fridge filter change (every 6 months) ensures the system never breaks down. You can quickly scan the board, see what’s getting old, and plan a "clear out" dinner.
Sophie’s Final Thought: Organization isn't a one-time event; it’s a habit. The first time you organize will be the hardest, but once you have your "flat-frozen bricks" and your whiteboard map in place, maintaining it takes less than five minutes a week. You’ll find yourself cooking more at home, wasting less money, and finally feeling like the master of your kitchen.
FAQ
How long can I actually keep meat in the freezer? While food kept at 0°F is technically safe indefinitely, the quality begins to degrade after a while. For the best flavor and texture, try to use ground meats within 3-4 months and whole cuts (like steaks or roasts) within 6-12 months. Always check for signs of freezer burn (dry, gray patches) before cooking.
What should I do if my freezer loses power? Keep the door closed! A full, well-organized freezer (thanks to your dense "flat-frozen bricks") will hold its temperature for about 48 hours if the door remains shut. A half-full freezer will only last about 24 hours. This is another reason why maintaining a full, organized freezer is beneficial—it acts as its own thermal mass.
Can I freeze glass jars? Yes, but with caution. Only use jars specifically labeled as freezer-safe (usually wide-mouth jars with straight sides). Leave at least an inch of "headspace" at the top, as liquids expand when they freeze. If you don't leave room, the glass will shatter. For beginners, I always recommend high-quality freezer bags or silicone containers first.