There is a specific kind of heartbreak known only to the indoor gardener. It happens the moment you finish repotting your favorite Monstera and look down to find a fine layer of potting soil, perlite, and muddy water ground into your beige apartment carpet or wedged between the floorboards of your kitchen. We call this the "Indoor Mudroom" effect—the messy byproduct of bringing the great outdoors into a confined living space.
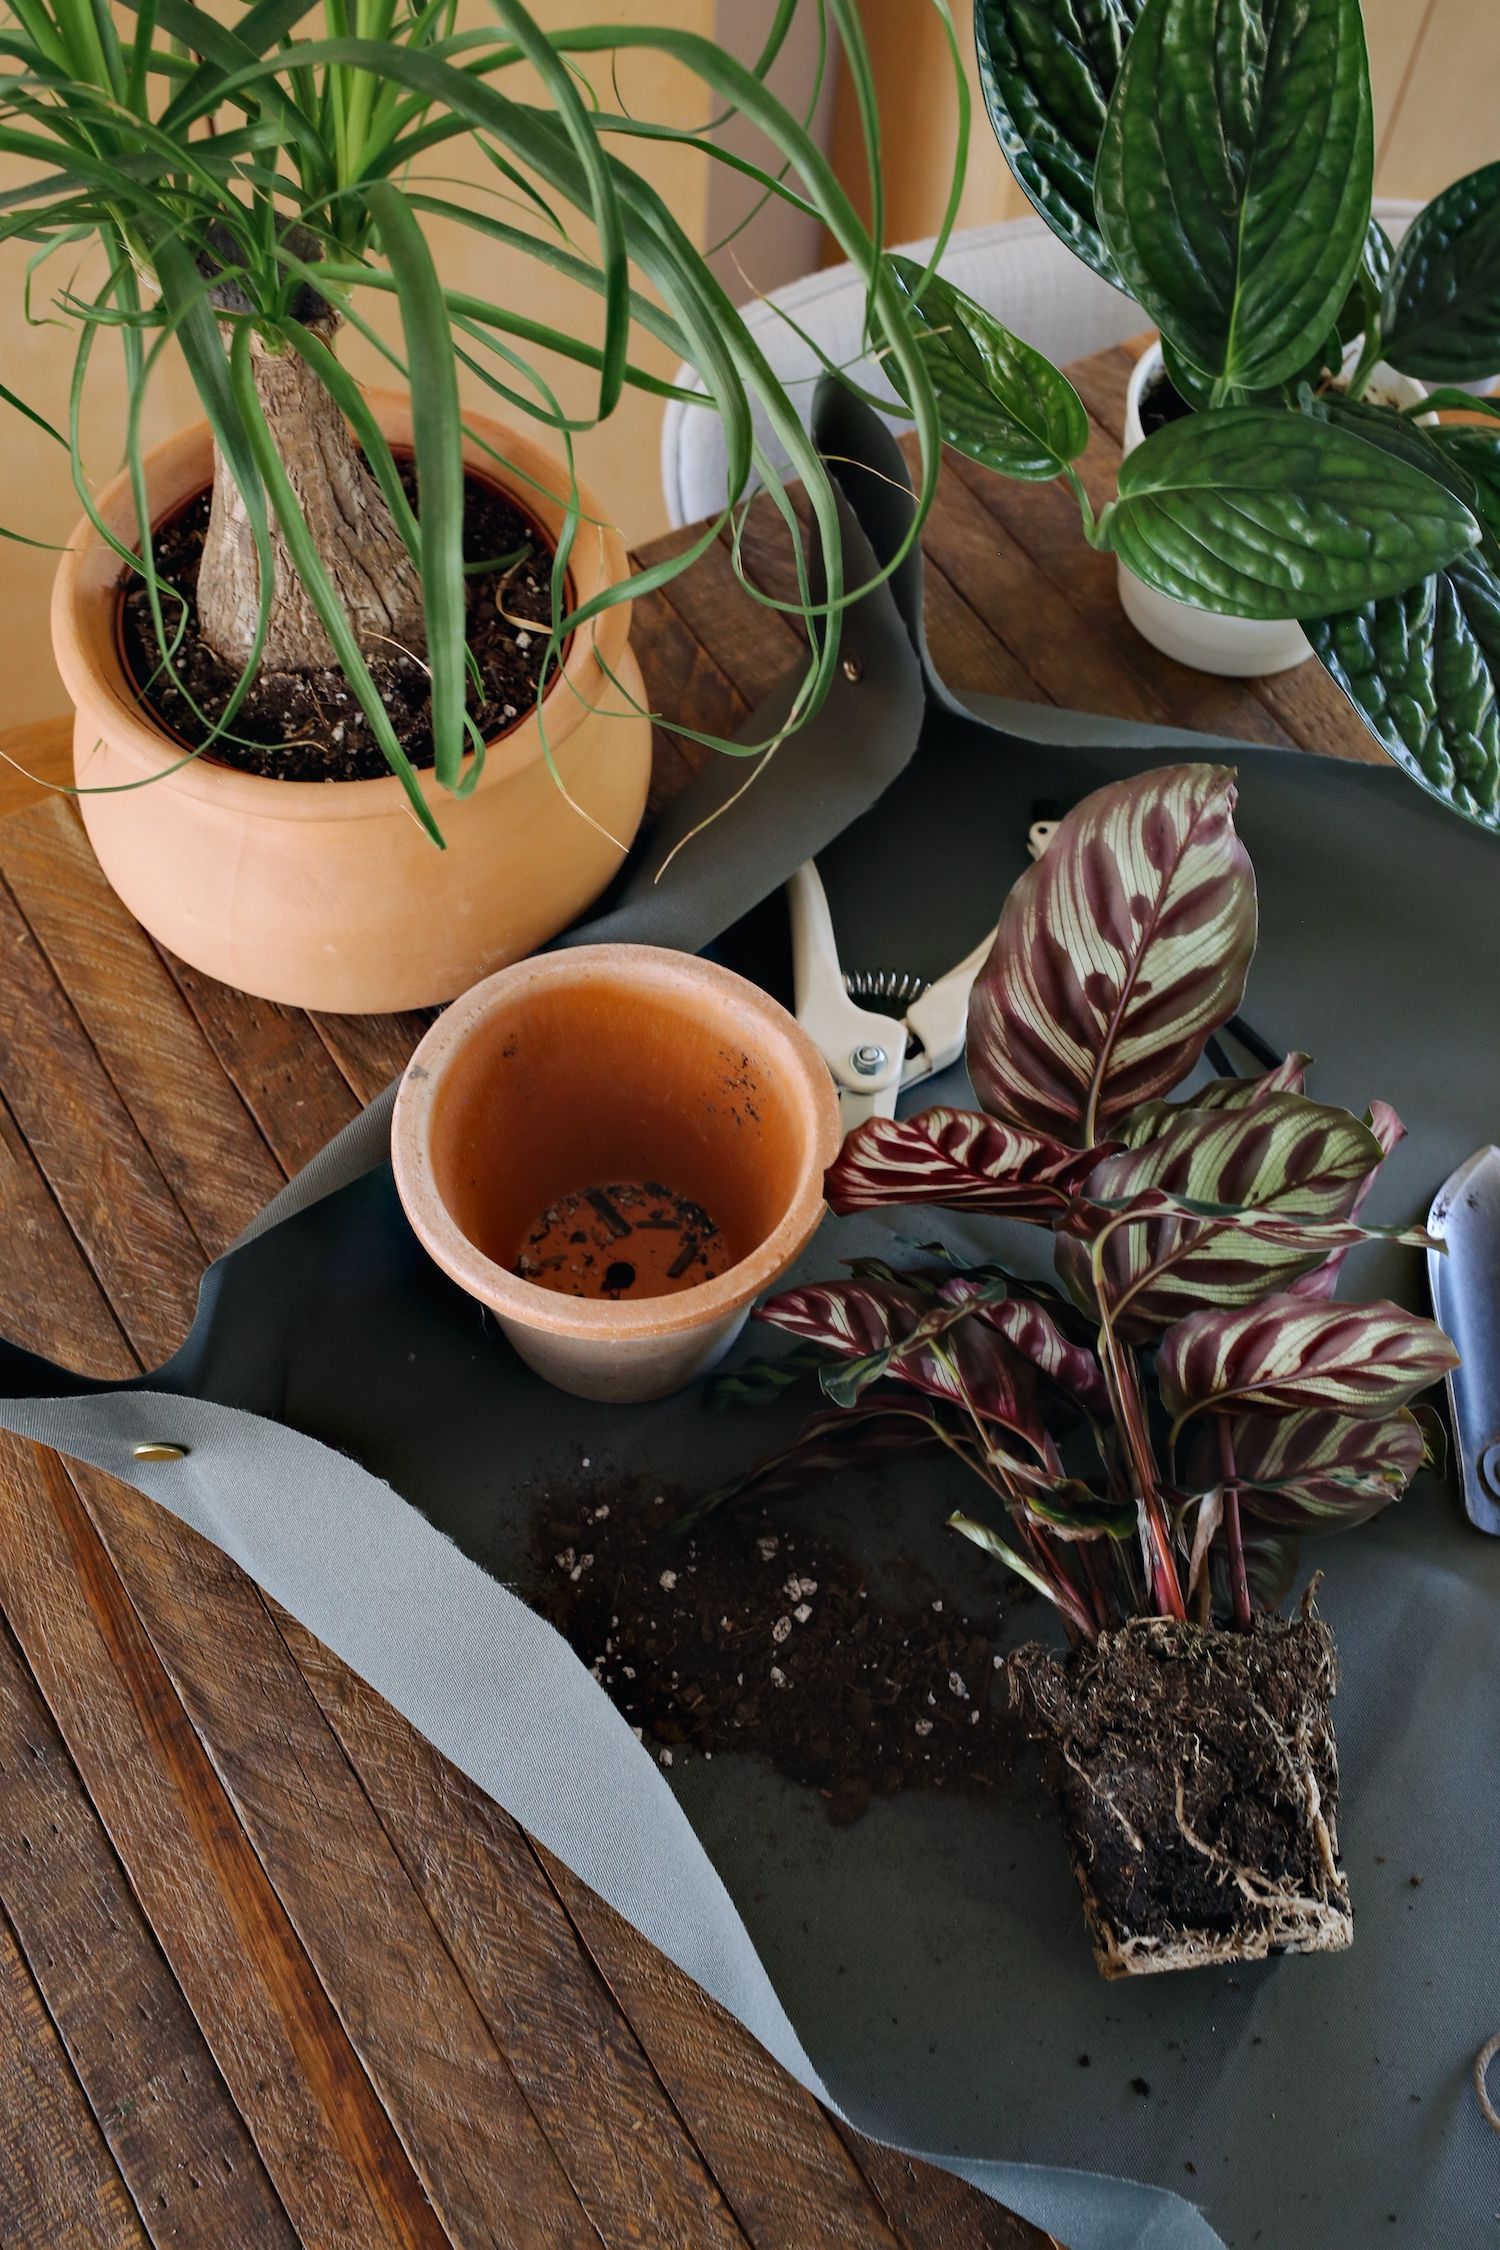
If you’ve been avoiding repotting because you don’t want to deal with the inevitable cleanup, I have the perfect solution for you. To keep your indoor gardening area clean, you should use a waterproof DIY potting tarp with snap-up corners. This simple project creates a contained workspace that prevents soil and water spills from ever touching your furniture or floors. Think of it as a "sandbox" for adults that you can fold up and hide away in seconds.
Why Your Workspace Needs a Dedicated Potting Mat
In small space living, every square inch counts. We often try to "make do" by spreading out old newspapers or trash bags on the dining table, but these are flimsy, prone to tearing, and rarely contain the mess when a watering can tips over.
A custom-made potting tarp provides a psychological and physical boundary. When the tarp comes out, it signals to your brain that it’s time to focus on your plants. More importantly, the scale of a dedicated mat is impressive: a standard 24” x 34” medium-sized potting tarp provides over 800 square inches of contained workspace. That is more than enough room to repot plants up to 12 inches in diameter, mix your custom soil blends, and prune leggy vines without a single speck of dirt escaping.
Beyond the cleanliness factor, there is the sustainability angle. By using a durable, waterproof canvas, you are moving away from single-use plastics and paper. It’s a one-time investment in your home’s utility that will last for years of growing seasons.
DIY Tutorial: The Portable Potting Mat
This is one of my favorite "weekend warrior" projects because it requires minimal sewing (or none at all if you’re savvy with fabric glue) and provides immediate gratification.
Essential Materials List
Before we dive into the construction, let's gather the supplies. Most of these can be found at your local craft store or ordered online.
- 1/2 yard of waterproof canvas: Look for "Outdoor Canvas" or "600D Polyester" with a PVC backing.
- 5 heavy-duty snap fasteners: One for each corner and one for the storage strap.
- Snap plier kit: Necessary for setting the snaps securely.
- 16-inch strap or heavy ribbon: For the integrated storage tie.
- Fabric scissors and a measuring tape.
Pro-Tip: Material Swaps If you want a more "organic" or high-end aesthetic, you can swap the waterproof canvas for waxed canvas. It offers excellent water resistance and develops a beautiful patina over time. For a budget-friendly version, a heavy-duty vinyl tablecloth or even an old leather coat from a thrift store can be repurposed.
Step-by-Step Construction
1. Cutting the Base Start by laying your fabric flat on a clean floor. Measure and cut a rectangle that is 24 inches by 36 inches. This "medium" size is the sweet spot for most apartment dwellers, but feel free to scale up if you have the floor space. If your fabric is prone to fraying, you can run a quick hem around the edges or use a "no-sew" fabric tape to secure the perimeter.
2. Installing the Snap Fasteners This is the magic step that turns a flat sheet into a tray. On each corner, mark a point exactly 4 inches in from both sides. This is where your snaps will go. Using your snap pliers, install the "male" side of the snap on one edge and the "female" side on the adjacent edge.
When you snap these together, the fabric will pinch upward, creating a 4-inch tall wall around the entire perimeter. This wall is your primary defense against rolling LECA balls and spilled water.
3. Adding the Storage Belt To make this truly portable and workspace-friendly, you need a way to keep it tidy. Fold your finished tarp into quarters. Once it’s in its folded state, wrap your 16-inch strap around it to find the best placement. Sew one end of the strap to the center-back of the tarp and install your fifth snap on the other end. Now, your tarp can be rolled up and secured like a yoga mat.
Optimizing Your Garden 'Home Office'
Now that you have your contained workspace, where should you put it? Creating a mess-free environment is about more than just the tarp; it’s about the "zoning logic" of your room.
Desk and Bench Placement
If you are setting up a permanent gardening nook, position your bench or table perpendicular to your windows. This is a trick I learned from home office design—it provides plenty of natural light for your plants and for you to see what you’re doing, but it avoids the direct glare and eye strain that comes from facing a window head-on.
The Hydroponic Edge
If you love the idea of indoor greenery but truly despise the "dirt" part of gardening, consider integrating hydroponic systems into your workspace. Systems like the AeroGarden or Lettuce Grow utilize up to 90% less water than traditional soil gardening. Because they are closed-loop systems, the "mess factor" is almost zero. They fit perfectly on the corner of a desk, providing a lush, green backdrop for your Zoom calls while keeping your workspace pristine.
| Tarp Size | Workspace Area | Best For |
|---|---|---|
| 20” x 20” (Small) | 400 sq. inches | Succulents and 4-inch pots |
| 24” x 34” (Medium) | 816 sq. inches | General repotting and mixing soil |
| 36” x 36” (Large) | 1,296 sq. inches | Large floor plants (Monsteras, Palms) |
Storage and Long-Term Maintenance
The beauty of a DIY potting tarp is that it shouldn't be a permanent fixture on your dining table. The best way to store garden gear in a small workspace is to think vertically.
Once you’ve finished your repotting session, don't just dump the soil in the trash. Use the tarp as a funnel to pour excess soil back into its bag. For cleaning, a simple wipe-down with a damp cloth and a mild soap is usually all you need. If you've been dealing with a sick plant, a quick spray of diluted isopropyl alcohol will disinfect the surface and prevent the spread of pests or fungi.
Fold your waterproof potting tarp into quarters, secure it with the built-in snap-closure belt we added in the DIY steps, and store it vertically in a basket or on a shelf. Storing it vertically minimizes its footprint and ensures it’s always ready for the next time a plant starts looking a little "root-bound."
Frequently Asked Questions
Can I wash my potting tarp in the washing machine? I don't recommend putting waterproof canvas in the washing machine, as the heat and agitation can break down the PVC or waxed coating. Stick to spot cleaning with a sponge. If it gets really grimy, hose it down in the shower and let it air dry completely before folding it back up.
What is the best fabric for a heavy-duty mat? If you are doing heavy-duty work with sharp tools, go with a 1000D Cordura nylon. It’s the same material used for tactical gear and high-end backpacks. It’s nearly impossible to tear and is 100% waterproof.
How do I prevent the snaps from pulling out of the fabric? If your fabric feels a bit thin, add a small "reinforcement square" of extra fabric or a scrap of leather behind the snap before you press it. This gives the snap something more substantial to grab onto and prevents it from ripping through the canvas over time.
Conclusion & Share Your DIY Garden Setup
Creating an indoor garden shouldn't mean sacrificing the cleanliness of your home. By spending an hour on this DIY potting tarp, you’re not just making a tool—you’re creating a ritual. You’re giving yourself the freedom to get your hands dirty without the anxiety of the cleanup that follows.
I’d love to see how your potting mats turn out! Did you choose a bold patterned canvas or a sleek, minimalist leather? Tag me in your project photos and show me your "contained" indoor garden workspaces. Happy planting!